RideWind guide
How RideWind works
Plan your ride with confidence: RideWind places wind and weather along the kilometres ahead of you. Import a planned Komoot tour, a saved Strava route, or upload a GPX route; then choose when you plan to ride and get a route-specific forecast—free to use today, with no paid plan required.
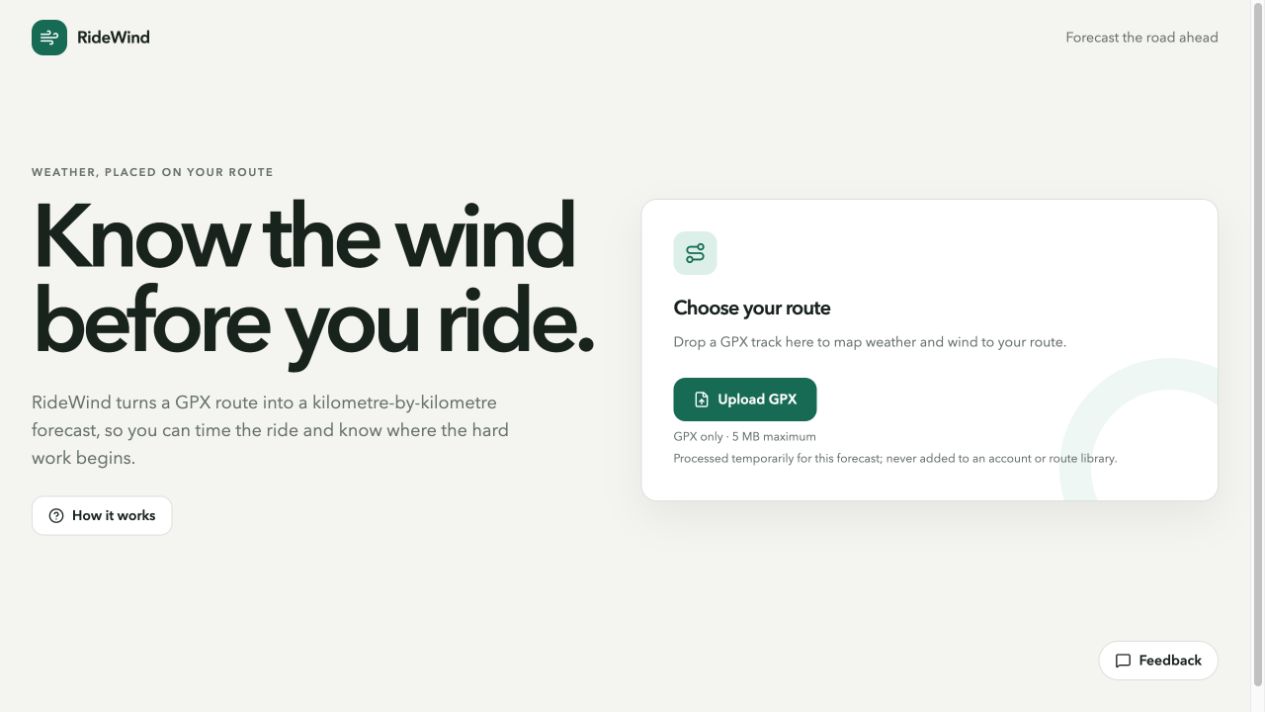
1. Choose your route
On the home page, choose Import from Komoot for a planned Komoot tour, Import from Strava for a saved Strava route, or upload a GPX file from any route planner, bike computer, or navigation app.
To use a GPX file, create or save a route in your preferred app, then use its export or share menu to download the route. Look for options such as Export GPX, Download GPX, or Save route file.
RideWind accepts route and track files ending in .gpx up to 5 MB. The route must be at least 100 metres and no more than 1,000 km long.
2. Import a planned Komoot tour
- Create a RideWind account or sign in.
- Choose Import from Komoot on the home page.
- Enter your Komoot email and password to establish the connection.
- Search or browse your planned tours, then select Import.
RideWind uses your Komoot password only to establish the connection. It does not retain that password; the API credential returned by Komoot is encrypted server-side so your planned tours remain available when you return. RideWind downloads and processes only the tour you choose, then discards its original GPX file.
3. Import a saved Strava route
- Create a RideWind account or sign in, then choose Import from Strava on the home page.
- Select Connect with Strava and approve the requested access to your saved routes, including private routes.
- Browse your saved routes or search the routes already loaded into RideWind, then select Import for the route you want to analyse.
Strava authorizes RideWind directly, so RideWind never receives your Strava password. RideWind stores encrypted OAuth tokens for your account, requests the selected route only, and discards its original GPX file after processing.
4. Set your ride plan
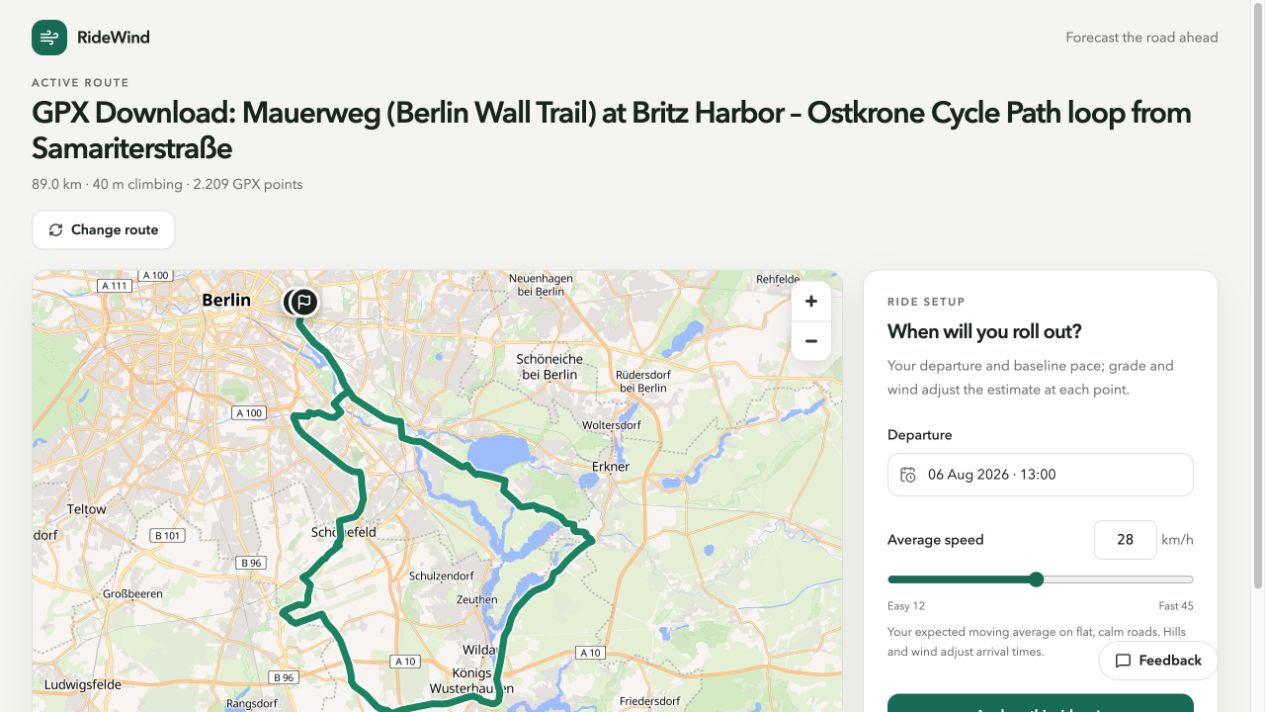
Choose your departure time and normal moving average. RideWind uses that speed to estimate when you will reach each section of the route.
5. See weather where and when it matters
RideWind requests forecast data for points along your route, then maps wind, gusts, temperature, rain, and conditions to your estimated arrival time at each kilometre. This helps reveal where headwinds, gusts, or weather may make the ride harder.
6. Explore wind and weather on the map
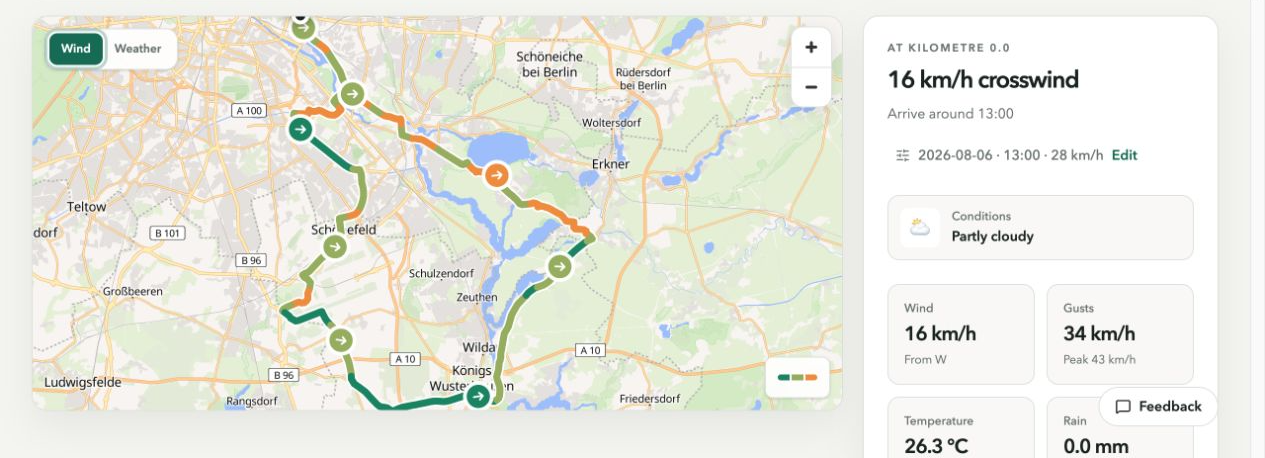
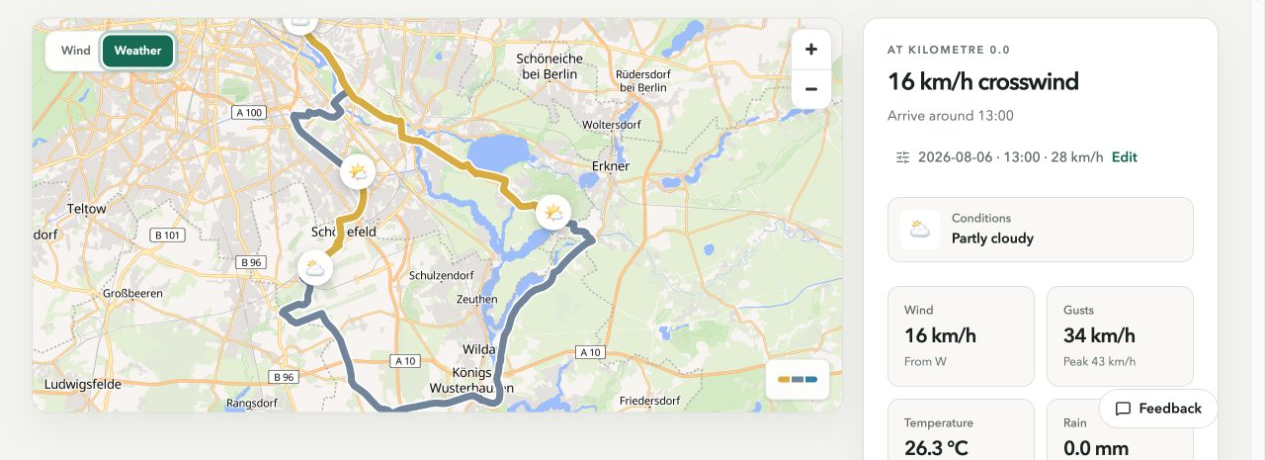
The map places the forecast on your route. In the Wind view, route colours show where wind will help or resist you, while arrows show wind direction. Switch to Weather to view conditions along the route.
Move your pointer over the route or select a section on the map to update the details panel. You can also use the route-position slider and previous/next controls to move kilometre by kilometre. The panel shows your estimated arrival time, wind, gusts, temperature, rain, and current conditions for the selected point.
7. Read the ride briefing
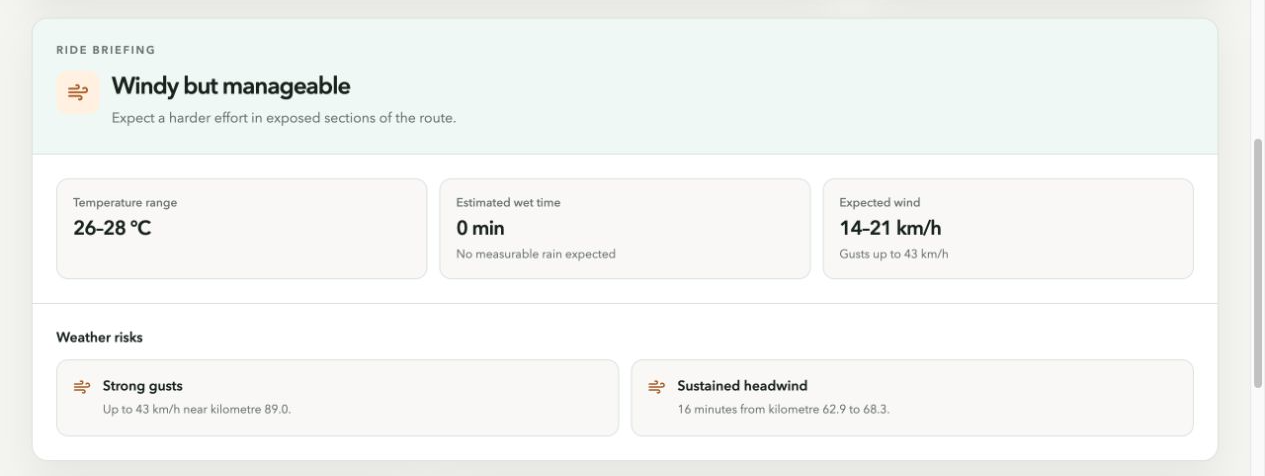
The ride briefing gives you the headline for the whole ride, then summarises the temperature range, expected wet time, wind range, and maximum gusts. When RideWind finds a material risk, such as strong gusts, rain, difficult headwind, heat, or cold, it lists the affected section so you can plan accordingly.
8. Compare the route profile and table
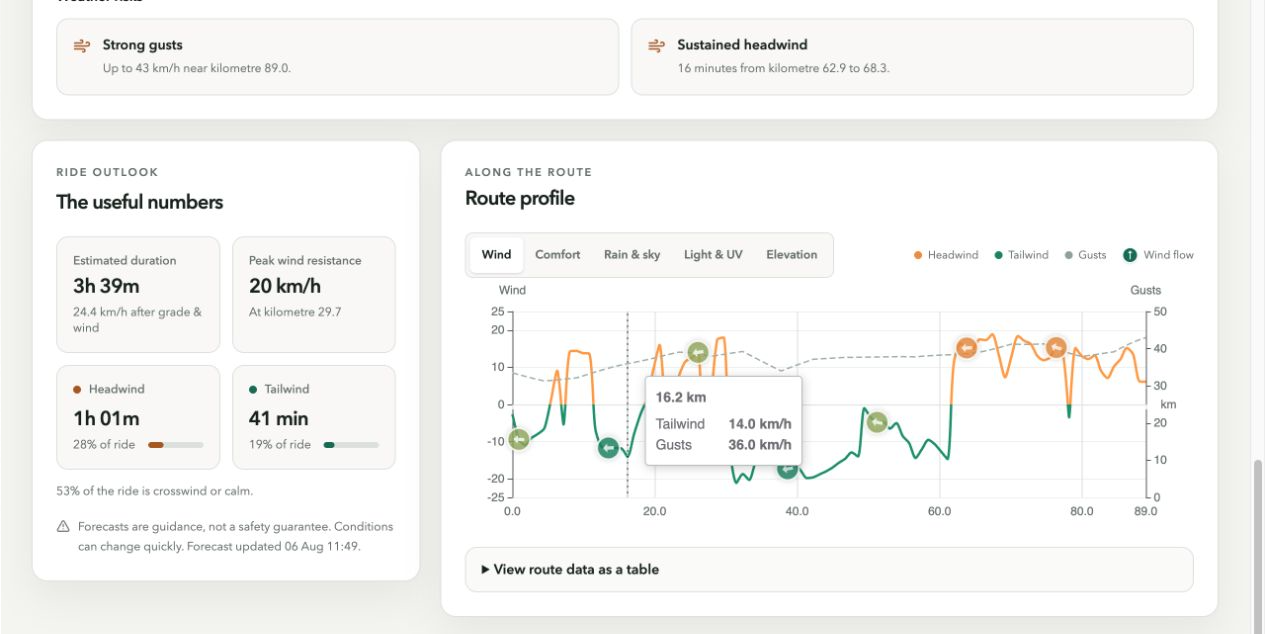
The route profile charts conditions by distance. Choose Wind, Comfort, Rain & sky, Light & UV, or Elevation to compare the factors that matter to your ride. Select a point in the chart to inspect that same point on the map and in the details panel.
Open View route data as a table for a scrollable, kilometre-by-kilometre forecast. It includes arrival time, elevation, wind effect, gusts, temperature, conditions, and rain.
9. Save routes and check the ride outlook
Signed-in riders can save an imported or uploaded route to My Routes and return to it later. The ride outlook turns the route forecast into a quick planning summary: estimated duration at your chosen average speed, the strongest wind resistance and where it occurs, plus expected headwind, tailwind, crosswind, or calm exposure. Use it to judge the overall effort before you set off.
Use forecasts as planning guidance
Forecasts can change and local conditions may differ from the data shown. Check the latest weather and make your own safety decisions before and during every ride.
Troubleshooting
- My file will not upload
- Confirm it is a GPX file, is under 5 MB, and contains a route or track rather than only waypoints. Export the route again from its original app if necessary.
- I cannot import a Komoot tour
- Sign in to RideWind first, then check your Komoot email and password. RideWind shows planned Komoot tours only. If the connection has expired or Komoot is temporarily unavailable, reconnect or try again shortly.
- I cannot import a Strava route
- Sign in to RideWind, select Import from Strava, and approve the requested access in Strava. RideWind imports saved routes only. If Strava does not load your routes, try again shortly or reconnect through the import flow.
- My forecast could not be prepared
- Check your connection and try again shortly. Departure times must be in the future and within the next 16 days.
- The map is unavailable
- Your route forecast may still be available in the ride dashboard. Refresh the page or try again later if the map does not load.
Still need help?
Use the Feedback button to report a problem, ask a question, or share an idea with the RideWind team.
Plan a ride